SonarQube 도입을 위한 여정
Fastlane과 Docker 를 이용해서 간단하게 SonarQube 적용하기
1. 설치항목
- SonarScanner
- SonarQube ( docker 를 사용할 예정이므로 제외 )
- sonar-apple-plugin
- Docker & Docker sonarqube Image
- homebrew
- ruby
- Fastlane ( scan, slather, swiftlint, lizard, periphery, mobsfscan )
- scan ( build & test )
- slather ( code coverage )
- lizard ( code complexity )
- periphery ( dead code )
- mobsfscan ( security )
2. SonarQube 정적 분석 flow
- fastlane 에서
sonar-scanner를 이용하여 swift 코드를 정적 분석합니다. - 분석된 report 파일을 sonarqube 에 등록하며 자료를 시각화 합니다.
3. SonarQube 구축하기
1. SonarScanner 설치
-
- SonarScanner
- 위 페이지에서
SonarScanner를 설치합니다.
2. SonarScanner 환경변수 설정
- 설치한 SonarScanner 를 Applications 로 옮깁니다.
.bash_profile또는.zsher에 환경변수를 추가합니다.export PATH=$PATH:/Applications/SonarScanner/bin
2. SonarQube 서버 구성하기
: 현재 SonarQube 정식 상품을 사용하고 있지 않기 때문에 임의로 로컬 서버에서 구축하였습니다.
- Docker 를 설치합니다.
2. Docker 에서 SonarQube image 를 설치합니다.
$ docker pull sonarqube - docker 에서 sonarqube 실행시키기
docker run -d --name sonarqube -p 9000:9000 sonarqube

위와 같이 docker 에 container 가 생겼다면 정상입니다. http://localhost:9000/about 을 통해 서버가 띄워졌는지 확인할 수 있습니다.
-
- sonar-apple-plugin 설치하기
- 위 링크에서 sonar-apple-plugin-0.4.0.jar 을 설치합니다.
많은 자료에서는 sonar-swift-plugin 를 사용하라고 하지만 저는 버전 호환성이 안맞아서 sonar-apple-plugin 을 사용하였습니다.
무료로 사용하는 sonarQube 의 경우 swift 정적 분석을 지원하지 않는 것 같습니다. ( 결제를 하게 되면 공식적으로 사용할 수 있는 것 같습니다. )
- sonarqube 에
sonar-apple-plugin파일 추가하기
- docker > container > sonarqube > files 에 파일을 추가해야 합니다.
- files > opt > sonarqube > extensions > plugins 폴더에
sonar-apple-plugin을 추가합니다.

-
- docker 에서 sonarqube 재실행 시키기
http://localhost:9000/about를 통해 로컬에 띄워진 sonarqube 서버에 접속할 수 있습니다.
초기 admin 계정 정보는 (admin/admin) 입니다.
3. fastlane 설정하기
기본적으로 sonarqube 에서 정적 분석 리포트를 확인하려면 sonar-scanner 를 이용하여 분석한 결과를 sonarqube 서버에 등록해야 합니다.
-
- fastlane 설치 및 초기화
- 1.1
$ brew install fastlane - 1.2
$ fastlane init - 프로젝트 내에서 fastlane init 을 통해 fastlane 초기 환경을 구축합니다.
-
- fastfile 설정하기
- 이번에 분석을 위해 사용할 패키지는 (
scan,slather,swiftlin,lizard,Periphery)
default_platform(:ios)

platform :ios do
	lane :sonarTest do
        	sonarScan
		sonarSlather
		sonarLizard
		sonarLint
		sonarCustom
  	end

  lane :sonarCustom do
	sonar(
		project_configuration_path: "sonar-project.properties"
	)
  end

  lane :sonarScan do
	scan(
		scheme: "SampleProject",
		devices: ["iPhone 14 Pro", "iPad (10th generation)"],
		run_rosetta_simulator: true,
		code_coverage: true,
		derived_data_path: "SampleProject/DerivedData",
		workspace: "SampleProject.xcworkspace",
		clean: true,
		output_directory: "Reports"
	  )
  end

  lane :sonarSlather do
	slather(
		cobertura_xml: true,
		jenkins: true,
		scheme: "SampleProject",
		build_directory: "SampleProject/DerivedData",
		output_directory: "Reports",
		proj: "SampleProject.xcodeproj",
	)
  end

  lane :sonarLint do
	swiftlint(
		config_file: ".swiftlint.yml",
		output_file: "Reports/swiftlint.txt",
		ignore_exit_status: true
	)
  end

	lane :sonarLizard do
		lizard_action = ".../Library/Python/3.9/bin/lizard"
		root_path = ".../SampleProject/"
		language = "swift"
		project_path = "/#{root_path}/"
		excluded_paths = "\\"//#{root_path}/Pods/*\\""
		output_file = "/#{root_path}/Reports/lizard-report.xml"

		sh "#{lizard_action} #{project_path} -l #{language} -i 10000000 -x #{excluded_paths} > #{output_file}"
  	end
end
위 fastflie 에는 fastlane action 과 sh 를 이용하였습니다.
-
- swiftlint configuration 파일 설정하기
- swiftlint 의 경우 각자의 규칙을 다르게 사용하고 있으므로 configuration 파일을 활용하였습니다.
disabled_rules:
  - trailing_whitespace
  - function_parameter_count
opt_in_rules:
  - empty_count
  - empty_string
  - trailing_newline
  - colon
  - comma
included:
  - SampleProject
excluded:
  - Carthage
  - Pods
  - SwiftLint/Common/3rdPartyLib
line_length:
    warning: 150
    error: 200
    ignores_function_declarations: true
    ignores_comments: true
    ignores_urls: true
function_body_length:
    warning: 300
    error: 500
function_parameter_count:
    warning: 6
    error: 8
type_body_length:
    warning: 300
    error: 500
file_length:
    warning: 1000
    error: 1500
    ignore_comment_only_lines: true
cyclomatic_complexity:
    warning: 15
    error: 25
reporter: "xcode"
-
lizard설치 및 shell script 작성하기lizard는 code complexity 를 분석하여 리포트 해주는 패키지입니다.lizard-swift의 경우 fastlane 의 plugin 으로 제공하고 있으나lizard와 버전 호환이 안되기 때문에 shell 을 이용하여 직접 작성하였습니다.$ [sudo] pip install lizard을 이용하여 lizard 를 설치합니다.- lizard 에서 필요한 파라미터를 사용하여 script 를 작성합니다.
$ sh lizard [project_path] -l [language] -i [Int] -x [excluded_paths] > [output_file]"
lizard명령어를 실행합니다.[project_path]분석할 경로를 설정합니다.l [language]분석할 언어를 설정합니다.i [issue max count]허용할 issue 최대 개수를 설정합니다. ( 최대 개수를 초과하면 exit 됩니다. )x [excluded_paths]제외할 경로를 설정합니다.> [output_file]리포트 파일 경로를 설정합니다. ( 일반적으로lizard-report.xml을 사용하며, 파일을 생성시켜주지 않으므로 미리 생성시켜 놔야 합니다. )
-
- fastlane lane 을 실행시킵니다.
fastlane sonarTest

위 lane 이름을
sonarTest로 설정하였기 때문에 실행시키는 lane 이름을 그대로 사용하면 됩니다.
4. sonar-project.properties 파일 설정하기
1. sonar server 정보 설정하기
sonar.host.url=http://localhost:9000/
sonar.login=admin
sonar.password=1qaz2wsx#
위 정보에는 login, password 사용하였지만 sonarqube token 을 이용해서도 인증이 가능합니다.
2. sonarqube project 정보 설정하기
sonar.projectKey=SampleProject
sonar.projectName=SampleProject
3. language 정보 설정
sonar.language=swift
4. source 경로 설정하기
sonar.sources=SampleProject
5. 포함/예외 파일 설정하기
sonar.inclusions=**/*.swift
sonar.exclusions=*.xml, **/Pods
6. app project 정보 설정
sonar.swift.simulator=platform=iOS Simulator,name=iPhone 14 Pro,OS=16.4

sonar.swift.project=SampleProject.xcodeproj
sonar.swift.workspace=SampleProject.xcworkspace
sonar.swift.appName=SampleProject
sonar.swift.appScheme=SampleProject
sonar.swift.appConfiguration=Debug

sonar.sourceEncoding=UTF-8
7. 리포트 파일 경로 설정하기
sonar.junit.reportsPath=Reports/
sonar.junit.include=**/*.junit
sonar.swift.lizard.report=Reports/lizard-report.xml
sonar.swift.coverage.reportPattern=Reports/cobertura.xml
sonar.swift.swiftlint.report=Reports/swiftlint.txt
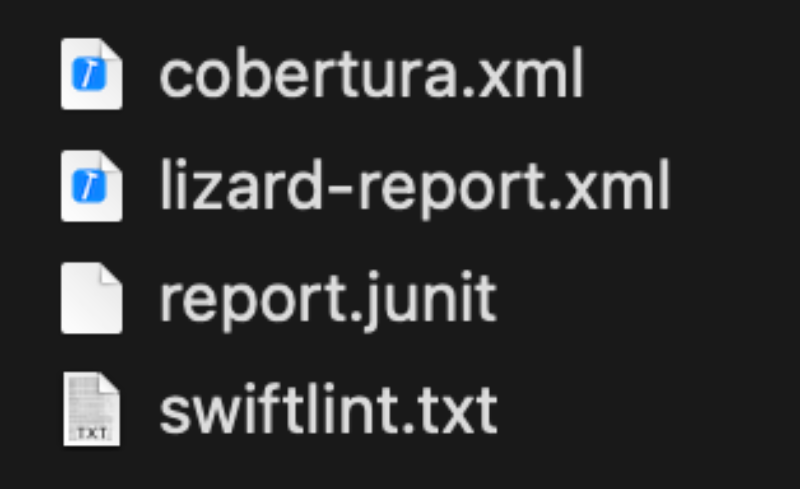
$ fastlane sonarTest 를 통한 리포트 파일 입니다.
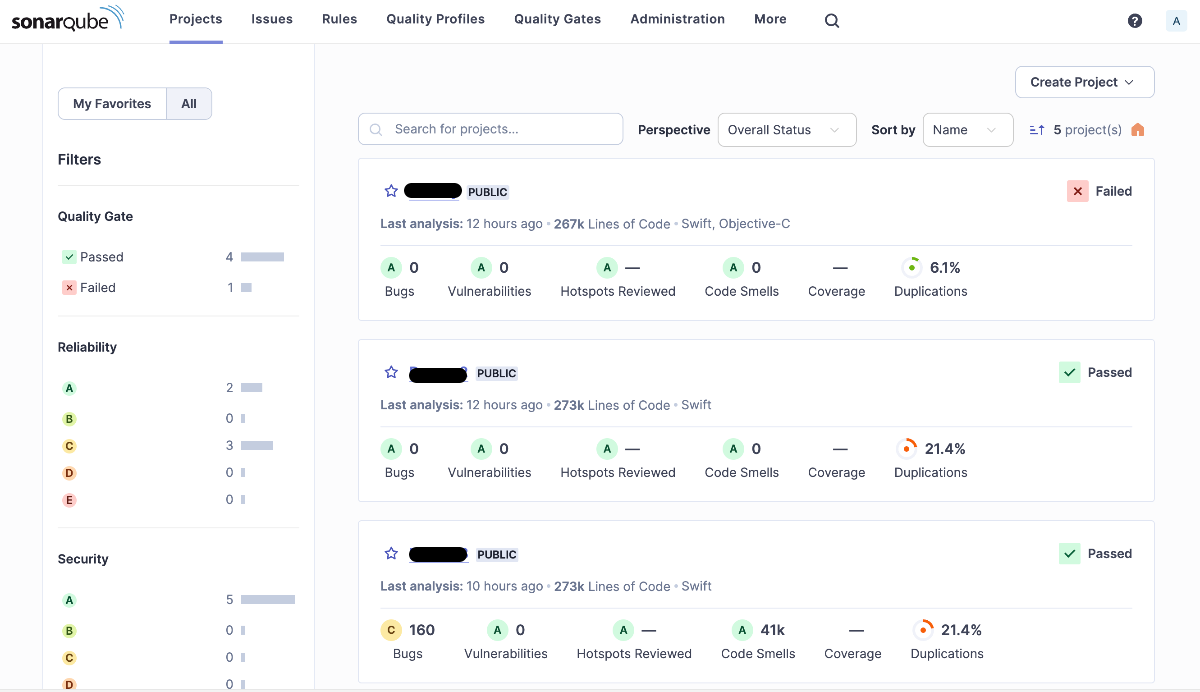
5. SonarQube 결과 확인하기
